Here is how to set Excel file read-only when using in MS Teams, OneDrive, or SharePoint. Those environments are different in the possibilities to change Excel file settings. Here is a quick walkthrough.
Set Excel file read-only in file info settings
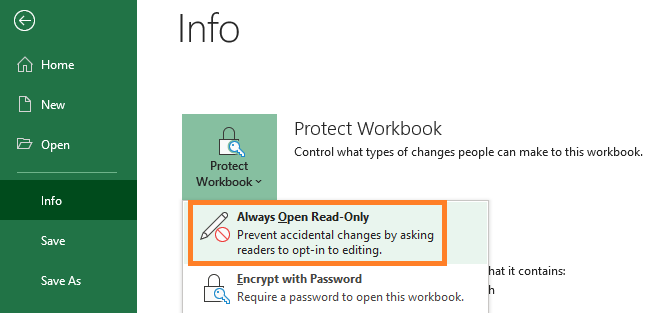
This approach will work for every MS Team user. Go to the File tab, choose Info, and set it to the read-only mode as in the picture below.

I don’t like the appearance of the yellow line when you open the file from MS Teams. As I’m writing this post, I didn’t find it possible to turn off that Excel yellow info line.
![]()
Ensure Excel file editing with password only
This approach still works. It is not so user-friendly because of additional password requests.
Here is how to set that.
1. File -> Save As.
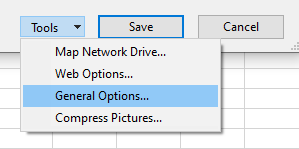
2. You will see Tools next to the Save button. Choose General Options.

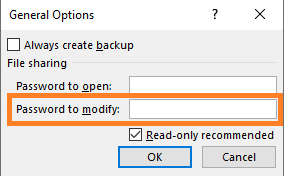
3. Add and confirm the password that you will need to modify the Excel file.

Set Excel file read-only in SharePoint
This approach will only work with users with Member or Visitor roles. For important files, I will mix this option with the options above.
1. Open a SharePoint site that contains necessary files. You can see how to do that from MS Teams in this post.
2. Choose your file an go to Manage Access.

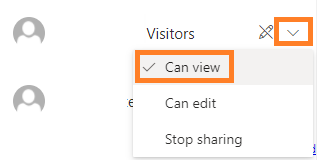
3. Set “Can View” where it is possible.

Conclusion
As you can see, there are many possibilities. There is also possible to right-click on the Excel file and set read-only in properties, but it is not properly working in MS Teams, SharePoint, or OneDrive environments.

Leave a Reply