
Here is an example with getting LiveChat transcripts right into Microsoft Excel Power Query or Power BI. Chat conversations are not the most convenient data what you can get through the API, because results are divided into pages, each containing 25 chats. So in the further post is a simple method of how to make pagination in Power Query.

If you want to skip the details, at the end of this post I published M code that you can use in Excel or Power BI Blank Query.
First of all here are instructions how the API works and how to make a call for all ended chats to see all texts that were written, all events, etc.
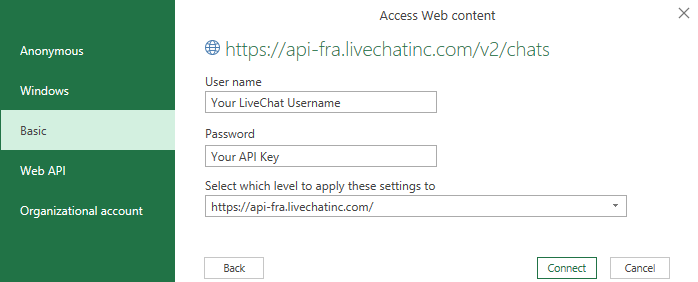
As you see in sample request below you will need username and password:
- Username is your LiveChat username;
- The password is your API key which you can get in your LiveChat profile and “My API key section” or by following this link. Here are some additional instructions.
![]()
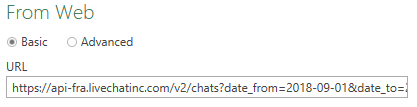
Now you can make request link as shown in API instructions. For example, all chat transcripts from 2018-09-01 to 2018-09-03 and first page. In further, I will explain how to get all the pages of chats and how to make data ranges in a more flexible way. LiveChat may be working on European servers, and in that case, request link is different from default instructions (that was my situation).
https://api-fra.livechatinc.com/v2/chats?date_from=2018-09-01&date_to=2018-09-03&page=1
Next steps are in Excel 2016, but there is a very similar approach in Power Query Add-in or Power BI.
1. Go to Data -> New Query -> From Other Data Sources -> From Web. If you have an option From Json then even better – go ahead with that. Write your request in URL box.
2. In authentication window change type to Basic and use your LiveChat username and API Key as a password.
3. If those steps are successful Power Query Editor Window appears with the summary information about the request. As you see in the next picture, there are 20 pages with chat, but we are requesting only first. For that reason, we will make some pagination in Power Query and combine all those pages. But first, we have to do all necessary actions with chats that are on the first page.

4. Click on List to get chat transcripts. The result will look like this.
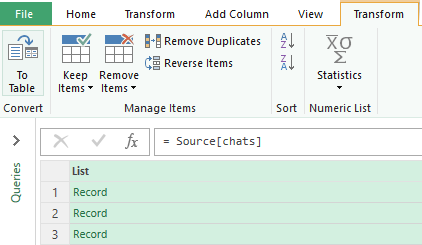
5. In Power Query’s Transform tab click on To Table.
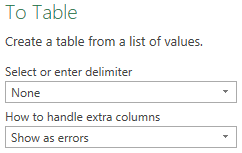
6. In To Table window everything stays the same.
7. Expand all the record in Column1 (I prefer not to use the original column name as a prefix).
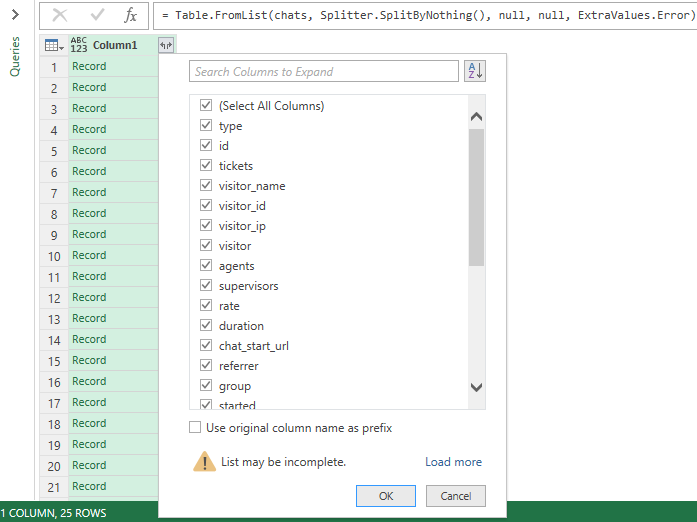
8. Then expand into new rows all necessary columns whose content you would like to see. For example messages and events. But be careful because by expanding some columns you can duplicate chat messages.

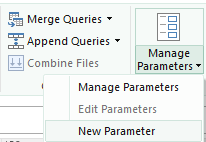
9. Let’s modify connection string with parameters for dates (so it will be easy to change them). In Power Query’s Home tab find Manage Parameters icon and choose New Parameter.
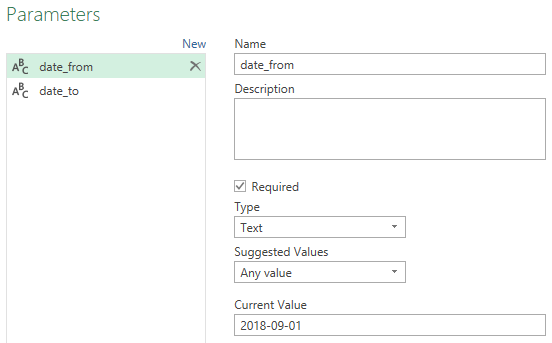
10. Make parameter date_from and parameter date_to as shown below.
11. Go to your transcript query (I will call it Pagination) and in View tab open Advanced Editor.
12. Modify Source with date parameters in quotation marks and & symbols (for example “&date_from&”).
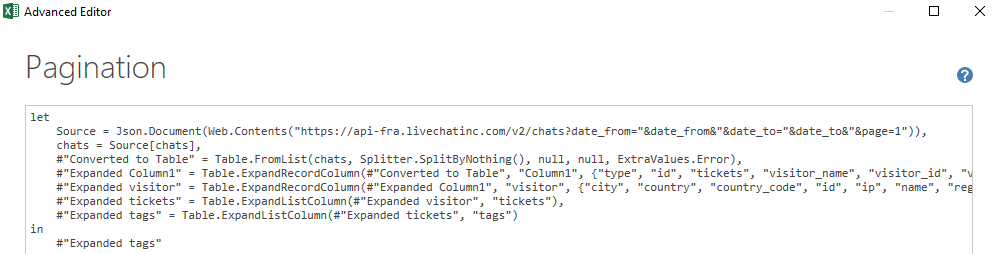
13. Let’s modify the page number in Source string and make this query as a function called Page. This will be used for pagination.
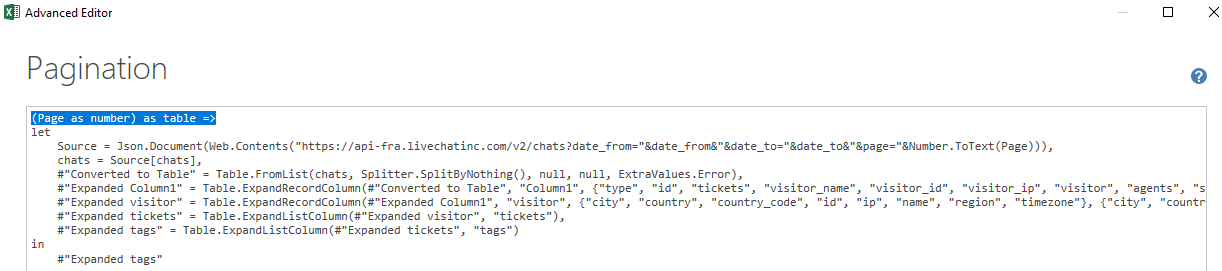
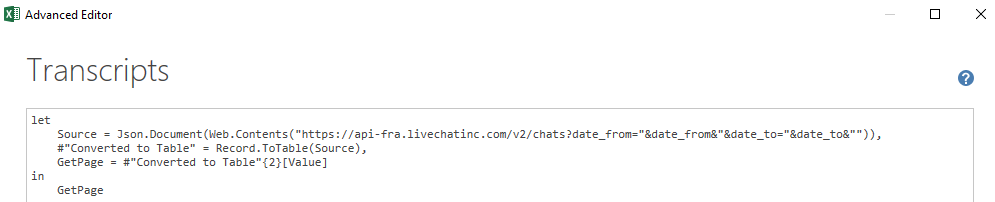
14. Make another connection where the magic will happen – we will detect a number of pages in the request and make some loop to gather all transcripts in one table. The easiest way is to copy M code form last query, go Data -> New Query -> From Other Data Sources -> Blank Query. Give it a name Transcripts. Open Advanced Editor, paste the code and simplify like this…
![]()
15. In the Convert tab click on Into Table.
16. Continue to work in Advanced Editor with the same query. Get a number of pages and assign them to a variable. It is doable by pointing out a page count position in the Value column. For example GetPage = #”Converted to Table”{2}[Value]
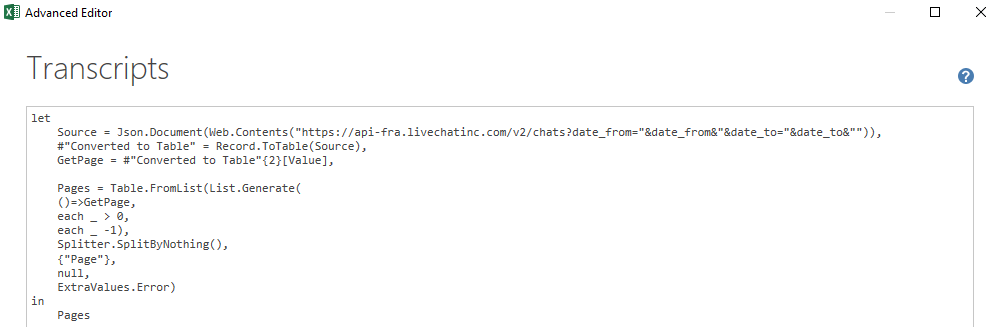
17. Make a table with page numbers from 1 to maximum (variable GetPage).
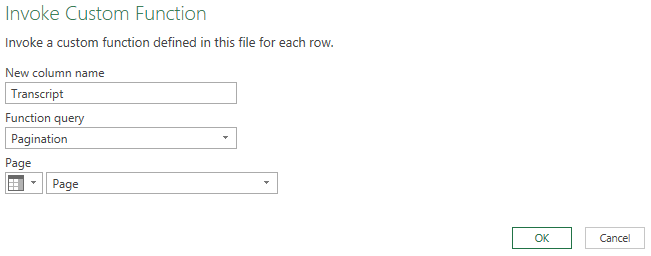
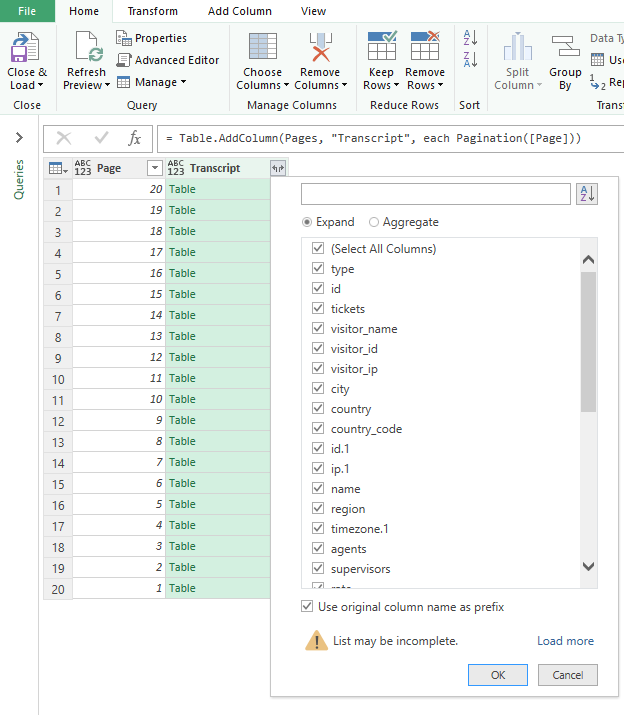
18. Now we can do pagination and generate a table with all transcripts. Go to Add Column -> Invoke Custom Function, under Function Query choose earlier created query Pagination and a function Page, add new column name and click OK.
19. Expand created column, choose columns that you need and enjoy results.
Your query pane should look like this.
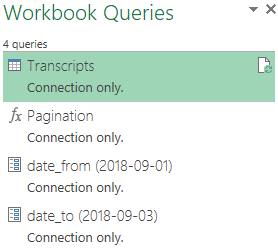
All the M codes are below. If you want to use them, start with the Blank Query. It is very important to give query names as they were defined.
There is a lot of things that you can do and analyze with those transcripts. Some other requests like a list of agents are simpler because you don’t have to deal with pagination. If you have some questions or comments, please share them with me.
//  query name is date_from

"2018-09-01" meta [IsParameterQuery=true, Type="Text", IsParameterQueryRequired=true]
// query name is date_to

"2018-09-03" meta [IsParameterQuery=true, Type="Text", IsParameterQueryRequired=true]
// query name is Pagination

(Page as number) as table =>
let
    Source = Json.Document(Web.Contents("https://api-fra.livechatinc.com/v2/chats?date_from="&date_from&"&date_to="&date_to&"&page="&Number.ToText(Page))),
    chats = Source[chats],
    #"Converted to Table" = Table.FromList(chats, Splitter.SplitByNothing(), null, null, ExtraValues.Error),
    #"Expanded Column1" = Table.ExpandRecordColumn(#"Converted to Table", "Column1", {"type", "id", "tickets", "visitor_name", "visitor_id", "visitor_ip", "visitor", "agents", "supervisors", "rate", "duration", "chat_start_url", "referrer", "group", "started", "custom_variables", "pending", "tags", "timezone", "messages", "events", "engagement", "started_timestamp", "ended_timestamp", "ended", "greeting", "postchat_survey"}, {"type", "id", "tickets", "visitor_name", "visitor_id", "visitor_ip", "visitor", "agents", "supervisors", "rate", "duration", "chat_start_url", "referrer", "group", "started", "custom_variables", "pending", "tags", "timezone", "messages", "events", "engagement", "started_timestamp", "ended_timestamp", "ended", "greeting", "postchat_survey"}),
    #"Expanded visitor" = Table.ExpandRecordColumn(#"Expanded Column1", "visitor", {"city", "country", "country_code", "id", "ip", "name", "region", "timezone"}, {"city", "country", "country_code", "id.1", "ip.1", "name", "region", "timezone.1"}),
    #"Expanded tickets" = Table.ExpandListColumn(#"Expanded visitor", "tickets"),
    #"Expanded tags" = Table.ExpandListColumn(#"Expanded tickets", "tags")
in
    #"Expanded tags"
// query name is Transcripts
let
Source = Json.Document(Web.Contents("https://api-fra.livechatinc.com/v2/chats?date_from="&date_from&"&date_to="&date_to&"")),
#"Converted to Table" = Record.ToTable(Source),
GetPage = #"Converted to Table"{2}[Value],
Pages = Table.FromList(List.Generate(
()=>GetPage,
each _ > 0,
each _ -1),
Splitter.SplitByNothing(),
{"Page"},
null,
ExtraValues.Error),
#"Invoked Custom Function" = Table.AddColumn(Pages, "Transcript", each Pagination([Page])),
#"Expanded Transcript" = Table.ExpandTableColumn(#"Invoked Custom Function", "Transcript", {"type", "id", "tickets", "visitor_name", "visitor_id", "visitor_ip", "city", "country", "country_code", "id.1", "ip.1", "name", "region", "timezone.1", "agents", "supervisors", "rate", "duration", "chat_start_url", "referrer", "group", "started", "custom_variables", "pending", "tags", "timezone", "messages", "events", "engagement", "started_timestamp", "ended_timestamp", "ended", "greeting", "postchat_survey"}, {"type", "id", "tickets", "visitor_name", "visitor_id", "visitor_ip", "city", "country", "country_code", "id.1", "ip.1", "name", "region", "timezone.1", "agents", "supervisors", "rate", "duration", "chat_start_url", "referrer", "group", "started", "custom_variables", "pending", "tags", "timezone", "messages", "events", "engagement", "started_timestamp", "ended_timestamp", "ended", "greeting", "postchat_survey"})
in
#"Expanded Transcript"

Leave a Reply