Here is an example of how to automatically upload files to SharePoint Online by using PowerShell. By knowing how to run PowerShell script from the Windows command line (CMD) you can also build a workaround to upload files during R or Python script execution.
SharePoint App Principal
In the beginning, you have to register the App Principal and configure it properly. App Principal is used to making the app authenticate with App Only Policy instead of real user credentials – it won’t ask the user to input the user name and password. It is a reliable solution if the account Multi-Factor Authentication is enabled.
More information is in this instruction.
SharePoint App Principal registration
1. You should have Owner access to the SharePoint site to make further steps easier.
2. If you’re logged in to your SharePoint site, modify your link according to this principle.
https://contoso.sharepoint.com/sites/My-site/_layouts/15/appregnew.aspx
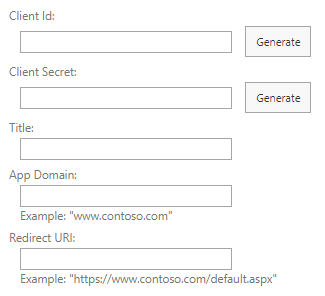
As a result, you will see this form and fill it in the next steps.

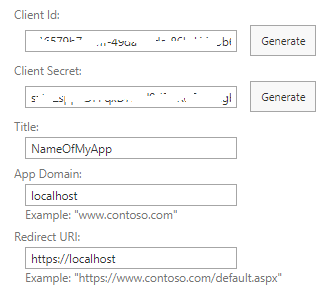
3. With the click of the button Generate to get your Client Id and Client Secret.
4. Save the Client Id and Client Secret for later.
5. Provide a title for your Principal.
6. App Domain: “localhost”, Redirect URL: https://localhost.

7. Click the Create button.
The app identifier has been successfully created. Copy App Id.
SharePoint App principal permission assignment
Now you have to do the permission assignment by following steps. You will need App Id.
1. Continue by modifying your link according to this principle.
https://contoso-admin.sharepoint.com/_layouts/15/appinv.aspx
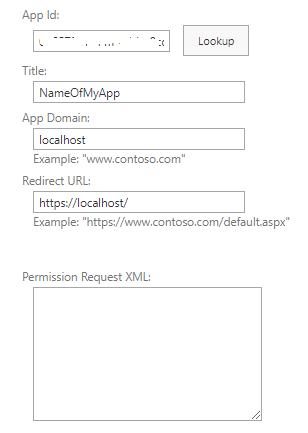
2. Copy your Client Id in the App Id field and click the Lookup button.
As a result, you will see this form and fill it in the next steps.

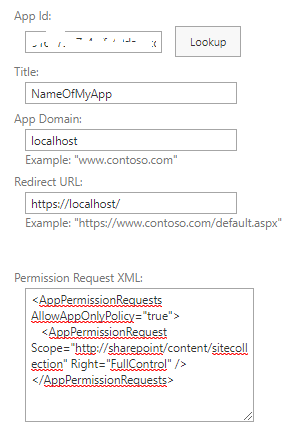
3. Put this in the Permission Request XML field to grant permissions and click Create Button.
<AppPermissionRequests AllowAppOnlyPolicy="true">
<AppPermissionRequest Scope="http://sharepoint/content/sitecollection" Right="FullControl" />
</AppPermissionRequests>

4. In the next question click the Trust It button.
Upload files to SharePoint site with PowerShell script
Inspiration for this solution comes from a www.sharepointdiary.com post, where you can find more advanced examples about multiple files uploading etc.
First of all, you will need to install the SharePointPnPPowerShellOnline module.
In this script, I call the PowerShell module from a custom location. You don’t necessarily do this.
Import-Module "C:\CustomLocation\SharePointPnPPowerShellOnline" -Force
#Site collection URL
$SiteURL = "https://YourCompany.sharepoint.com/sites/Your-SiteName"
#Connect to SharePoint Online with AppId and AppSecret
Connect-PnPOnline -Url $SiteURL -AppId "HereIsYourClientId" -AppSecret "HereIsYourClientSecret"
#Relative Path of the Library
$DestinationPath = "/Shared Documents/YourLocation"
$SourceFilePath ="C:\MyLocation\MyData.csv"
#Upload File to SharePoint Online Library
Add-PnPFile -Path $SourceFilePath -Folder $DestinationPath
Use PowerShell script within the R script
If you are interested to upload files to SharePoint that you generated with R, that is easy. Prepare your PowerShell script as in the example above and execute it during the R script.
system("cmd.exe", input = paste("powershell C:\\My\\location\\update_files.ps1"))
You can read more in this post: Execute Windows CMD command (PowerShell) from an R script.
Connect-PnPOnline : Token request failed
If your App is older than one year and previously worked, then most likely it is expired. Otherwise, check your AppId and AppSecret.
Upload file automatically to SharePoint
There are multiple ways how to do that in Windows, and a series of DataCornering posts might be helpful.

Leave a Reply