
Here is how to add an index column in Power Query in 2 easy steps. Index column in Power Query might be useful in data manipulations like returning next or previous record. It could be done in Excel or Power BI because they both share this great tool.
Here is an M code to quickly generate a little table with dates.
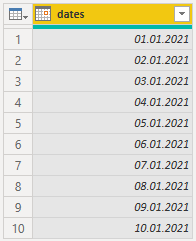

let
    Source = List.Dates(#date(2021, 1, 1), 10, #duration(1, 0, 0, 0)),
    #"Converted to Table" = Table.FromList(Source, Splitter.SplitByNothing(), null, null, ExtraValues.Error),
    #"Renamed Columns" = Table.RenameColumns(#"Converted to Table",{{"Column1", "dates"}}),
    #"Changed Type" = Table.TransformColumnTypes(#"Renamed Columns",{{"dates", type date}})
in
    #"Changed Type"
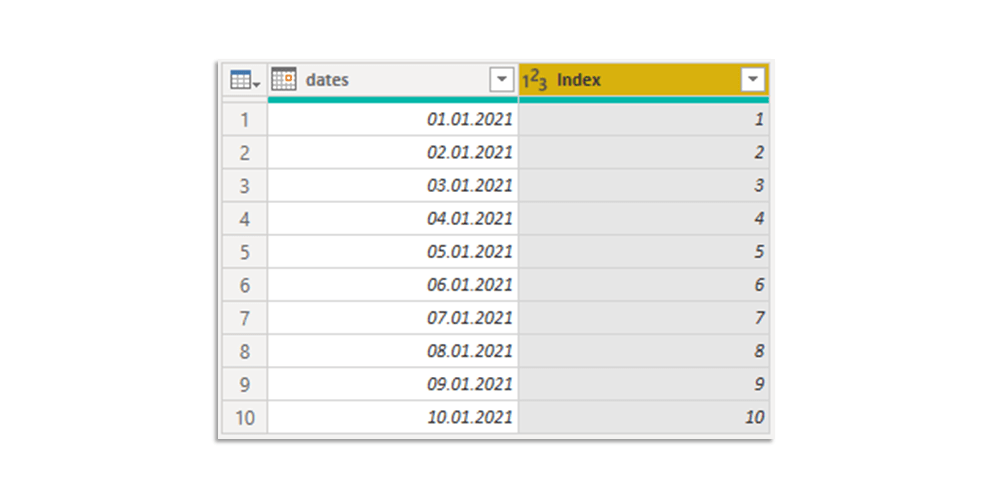
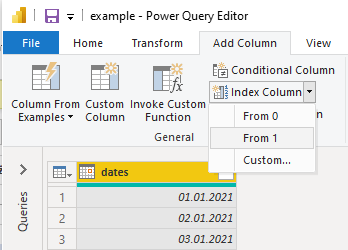
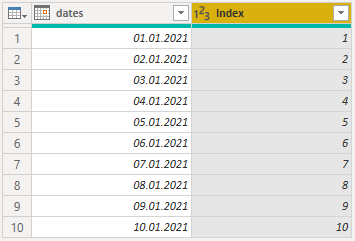
2 steps to add index column by using Power Query
1. Go to the Add Column tab in the Power Query window.
2. Choose Index Column and decide what will be the starting number.
And new column with the result is ready. Best wishes on the next tasks!


Adding index columns in Power Query is easy and useful. There are some situations where it is more complicated. If in your table are subcategories, then the Power Query group index might be needed. There is the possibility to create a group index by using DAX.
As you can see at the beginning of this post, it is possible to generate useful data in the Power Query for various tasks. If you are interested in this topic, then I recommend to you visit these posts:
1. Generate random numbers in Power Query
2. Generate date and time interval list using Power Query
3. Create a flexible calendar table with Power Query