
Here is a compilation of my favorite dplyr tips and tricks that are very useful and easy to learn. When I started to work with the dplyr package, the first thing was the shortcut for the pipe operator in Windows Ctrl + Shift + M. A little thing with a significant impact. That is why I love tips and tricks.
Dplyr tips and tricks summary
- Rename columns by using the dplyr select function
- Calculate in row context with dplyr
- Rearrange columns quickly with dplyr everything
- Drop unnecessary columns with dplyr
- Use dplyr count or add_count instead of group_by and summarize
- Replace nested ifelse with dplyr case_when function
- Execute calculations across columns conditionally with dplyr
- Filter by calculation of grouped data inside the filter function
- Get top and bottom values by each group with dplyr
- Reflow your dplyr code
1. Rename columns by using the dplyr select function
While there is a special function rename in the right situation, you can change the names of the columns in one take with the select function.
require(dplyr)

iris %>%
  select(
    SL = Sepal.Length,
    SW = Sepal.Width,
    PL = Petal.Length,
    PW = Petal.Width,
    Species
  ) %>%
  head()

#   SL  SW  PL  PW Species
#1 5.1 3.5 1.4 0.2  setosa
#2 4.9 3.0 1.4 0.2  setosa
#3 4.7 3.2 1.3 0.2  setosa
#4 4.6 3.1 1.5 0.2  setosa
#5 5.0 3.6 1.4 0.2  setosa
#6 5.4 3.9 1.7 0.4  setosa
2. Calculate in row context with dplyr
Let’s say I want to find a minimum value in every row of a few data frame columns. It sounds easy at first but might be a little confusing. Here is how to do calculations in row context with the dplyr rowwise function.
require(dplyr)

randu %>%
  rowwise() %>%
  mutate(min_xy = min(x, y)) %>%
  as.data.frame() %>%
  head()


#         x        y        z   min_xy
#1 0.000031 0.000183 0.000824 0.000031
#2 0.044495 0.155732 0.533939 0.044495
#3 0.822440 0.873416 0.838542 0.822440
#4 0.322291 0.648545 0.990648 0.322291
#5 0.393595 0.826873 0.418881 0.393595
#6 0.309097 0.926590 0.777664 0.309097
Here is another example of using apply function and a margin parameter that allows doing the calculations by rows or columns.
3. Rearrange columns quickly with dplyr everything
If you want to move your newly created calculation to the beginning of the data frame, you can do that by using functions select and everything. Here is what it looks like with the previous example.
require(dplyr)

randu %>%
  rowwise() %>%
  mutate(min_xy = min(x, y)) %>%
  select(min_xy, everything()) %>%
  as.data.frame() %>%
  head()

#    min_xy        x        y        z
#1 0.000031 0.000031 0.000183 0.000824
#2 0.044495 0.044495 0.155732 0.533939
#3 0.822440 0.822440 0.873416 0.838542
#4 0.322291 0.322291 0.648545 0.990648
#5 0.393595 0.393595 0.826873 0.418881
#6 0.309097 0.309097 0.926590 0.777664
There is a dplyr function relocate that will help to rearrange your data frame in more complex situations.
4. Drop unnecessary columns with dplyr
Sometimes it is more rational to choose what you don’t need in your data than otherwise. If the columns contain a keyword, you can use the dplyr function contains. This and other similar dplyr functions help to detect that and make column selection optimal.
require(dplyr)

iris %>% head()

#  Sepal.Length Sepal.Width Petal.Length Petal.Width Species
#1          5.1         3.5          1.4         0.2  setosa
#2          4.9         3.0          1.4         0.2  setosa
#3          4.7         3.2          1.3         0.2  setosa
#4          4.6         3.1          1.5         0.2  setosa
#5          5.0         3.6          1.4         0.2  setosa
#6          5.4         3.9          1.7         0.4  setosa

iris %>% select(-contains("Width")) %>% head()

#  Sepal.Length Petal.Length Species
#1          5.1          1.4  setosa
#2          4.9          1.4  setosa
#3          4.7          1.3  setosa
#4          4.6          1.5  setosa
#5          5.0          1.4  setosa
#6          5.4          1.7  setosa
5. Use dplyr count or add_count instead of group_by and summarize
If all that is necessary is a count of something in your R data frame, then a count or add_count function is good enough. It is equivalent to the combination of group_by and summarise, but shorter. You can give a name to a count column and save time with renaming.
require(dplyr)

iris %>% count(Species, name = "Species.Count")

#     Species Species.Count
#1     setosa            50
#2 versicolor            50
#3  virginica            50

iris %>% add_count(Species) %>% head()

#  Sepal.Length Sepal.Width Petal.Length Petal.Width Species  n
#1          5.1         3.5          1.4         0.2  setosa 50
#2          4.9         3.0          1.4         0.2  setosa 50
#3          4.7         3.2          1.3         0.2  setosa 50
#4          4.6         3.1          1.5         0.2  setosa 50
#5          5.0         3.6          1.4         0.2  setosa 50
#6          5.4         3.9          1.7         0.4  setosa 50
Here is an interesting video with more interesting tricks of dplyr count and other functions by David Robinson.
6. Replace nested ifelse with dplyr case_when function
Sometimes to avoid multiple nested ifelse statements, it is better to use the function mutate in combination with case_when that checks multiple conditions. It is easy to read and faster to write.
require(dplyr)

airquality %>%
  mutate(temp_cat = case_when(
    Temp > 70 ~ "high",
    Temp <= 70 & Temp > 60 ~ "medium",
    TRUE ~ "low"
  )) %>%
  head()

#  Ozone Solar.R Wind Temp Month Day temp_cat
#1    41     190  7.4   67     5   1   medium
#2    36     118  8.0   72     5   2     high
#3    12     149 12.6   74     5   3     high
#4    18     313 11.5   62     5   4   medium
#5    NA      NA 14.3   56     5   5      low
#6    28      NA 14.9   66     5   6   medium
7. Execute calculations across columns conditionally with dplyr
There are dplyr functions like across and mutate_if that are very useful for calculations or transformations for the range of columns.
Here is an example with a calculation of the maximum value across all numeric columns.
require(dplyr)

iris %>% summarise(across(where(is.numeric), max, na.rm = TRUE))

#  Sepal.Length Sepal.Width Petal.Length Petal.Width
#1          7.9         4.4          6.9         2.5
Here is a text transformation after which every character column contains text with capital letters.
require(dplyr)

starwars %>%
  select(1:5) %>%
  as.data.frame() %>%
  head()

#            name height mass  hair_color  skin_color
#1 Luke Skywalker    172   77       blond        fair
#2          C-3PO    167   75                gold
#3          R2-D2     96   32         white, blue
#4    Darth Vader    202  136        none       white
#5    Leia Organa    150   49       brown       light
#6      Owen Lars    178  120 brown, grey       light

starwars %>%
  mutate_if(is.character, toupper) %>%
  select(1:5) %>%
  as.data.frame() %>%
  head()

#            name height mass  hair_color  skin_color
#1 LUKE SKYWALKER    172   77       BLOND        FAIR
#2          C-3PO    167   75                GOLD
#3          R2-D2     96   32         WHITE, BLUE
#4    DARTH VADER    202  136        NONE       WHITE
#5    LEIA ORGANA    150   49       BROWN       LIGHT
#6      OWEN LARS    178  120 BROWN, GREY       LIGHT
In addition, there are two other examples with calculations across R data frame columns using lapply or dplyr with functions ifelse and variance across a range of columns.
8. Filter by calculation of grouped data inside the filter function
If you want to filter out of the data categories that contain a certain amount of rows, then here is how to do it by using the lesser know capability of the filter function. You can calculate a count inside the filter function and use the result to filter necessary rows.
require(dplyr)

mtcars %>% count(cyl)

#  cyl  n
#1   4 11
#2   6  7
#3   8 14

nmtcars <- mtcars %>% group_by(cyl) %>% filter(n() > 10)

nmtcars %>% count(cyl) %>% as.data.frame()

#  cyl  n
#1   4 11
#2   8 14
9. Get top and bottom values by each group with dplyr
If you want to get more values than only minimum and maximum for each group, it is easy to do that with dplyr slice_min and slice_max functions.
require(dplyr)

starwars %>% select(gender, mass) %>%
  group_by(gender) %>%
  slice_max(mass, n = 3, with_ties = F) %>%
  arrange(gender, desc(mass)) %>%
  tidyr::drop_na() %>%
  mutate(cat = "top3") %>%
  as.data.frame()

#     gender   mass  cat
#1  feminine   75.0 top3
#2  feminine   57.0 top3
#3  feminine   56.2 top3
#4 masculine 1358.0 top3
#5 masculine  159.0 top3
#6 masculine  140.0 top3


starwars %>% select(gender, mass) %>%
  group_by(gender) %>%
  slice_min(mass, n = 3, with_ties = F) %>%
  arrange(gender, desc(mass)) %>%
  tidyr::drop_na() %>%
  mutate(cat = "bottom3") %>%
  as.data.frame()

#     gender mass     cat
#1  feminine   50 bottom3
#2  feminine   49 bottom3
#3  feminine   45 bottom3
#4 masculine   20 bottom3
#5 masculine   17 bottom3
#6 masculine   15 bottom3
Here is another example.
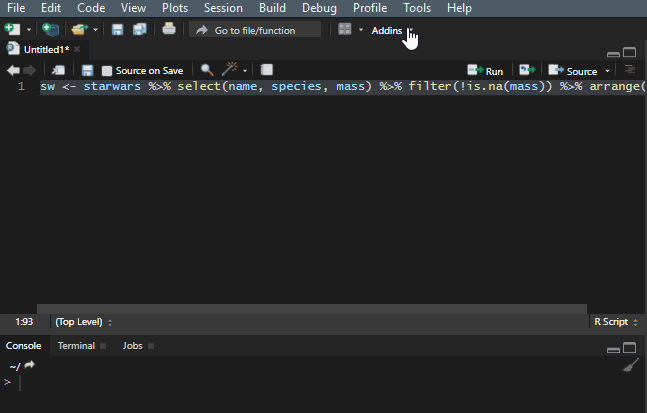
10. Reflow your dplyr code
It is important to make your R code easy to read. There is a shortcut Ctrl+Shift+A that is useful most of the time, but it doesn’t work very well with the dplyr pipes. To make my code readable in that situation, I use a Styler add-in, and you can find out more about that in this post.
Add to the dplyr tips and tricks
If you like to improve your work with R with useful dplyr tips and tricks, then here are my favorite RStudio tips and tricks.
Here are 5 ways how to format output in the R console.
Leave a Reply